

Acquisition Functions > The Acquire Set Up Command > Dialog Box Options
|
|
Dialog Box Options
Aspect Ratio
Specifies the aspect ratio of your microscope. The aspect ratio is the ratio of the image's X and Y dimensions. For many microscopes, with horizontal screens, this ratio is four to three or 1.3333. For microscopes with a vertical screen, the ratio would be three to four or 0.75.
Often, the Polaroid output doesn't show as much of the image as the screen. You may choose to match the aspect ratio of Polaroid film which would be 4.5 to 3.5 (1.2857). This lower aspect ratio means that for a given X dimension, fewer lines will be acquired. In this case, the system must be calibrated using the Acquire Calibrate Command to accept only those lines that appear on the Polaroid.
Standard Image Sizes
These edit controls allow you to specify the number of lines in each of the Small, Medium, Large and Extra Large images. The computer automatically calculates the X dimension based on the aspect ratio described above. These image sizes appear on the Acquire Image Size submenu.
You should refer to the specification from your microscope's manufacturer as to how many scan lines are generated at each scan speed. If, for example, the microscope produces only 500 scan lines at view speed, then it would not make sense to specify 512 lines for the small image. PCI/CFR depends upon the microscope to generate the scan signals and cannot acquire more lines than are actually produced.
Standard Image Type
For the Advanced Acquisition feature, you can choose either 8 or 12-bit images as the default image type.
Magnification Calibration
The magnification calibration parameters are used for calibrating the micron marker function (see The Micron Marker Button) and the measurement tool (see The Measurement Tool).
To set these parameters, simply acquire an image of a sample of known width (some kind of grating, for example) at a typical magnification. Then, determine the width (X dimension), in microns, of the entire PCI/CFR image. Enter the magnification and the width into the appropriate edit controls.
The widths of subsequent PCI/CFR images will be calculated automatically as follows:
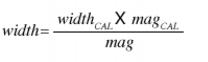
You can create magnification calibrations for multiple instruments by pressing the Add button and entering a name for your new magnification calibration. For each calibration, enter the parameters as described above. You can review the settings for a particular instrument by selecting the instrument's name from the drop-down list. In addition to being used for keeping track of calibrations from multiple instruments, this feature may also be used to calibrate different objective lenses on a light microscope.
The Default Print Width allows you to set a nominal print width for the images produced by the specified instrument. This is useful if the instrument superimposes a magnification setting on the image-this is the size of print for which the magnification will be correct. When you use the File Print command (see The File Print Command), selecting None for scaling will result in a print of this size. Selecting a scale factor will produce an appropriately scaled print. You can make fine adjustments to this figure for each instrument to ensure that the printed magnification is exactly correct.
|
|