

Drawing Tools > The Micron Marker Button
|
|
The Micron Marker Button
The micron marker button is used to add a micron marker to the overlay of an image. You may want to do this if you acquire a video image which doesn't include a micron marker (see The Abort Button is used to stop acquisition immediately without waiting until the end of the current frame. When you next press an acquisition button, the new image will overwrite the aborted image and a new image window will not be opened (unless you specify a different size).) or if PCI/CFR is unable to acquire the micron marker from your SEM. The micron marker button can also be used to calibrate the measurement functions (see The Measurement Tool).
Before you use the micron marker button for the first time, you should perform the magnification calibration described in the discussion of The Acquire Set Up Command.
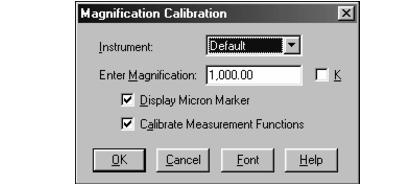
When you press the micron marker button, you will be presented with the Magnification Calibration dialog. Here you select which instrument you are using and enter the magnification. The "K" check box indicates that the magnification that you entered should be multiplied by a factor of one thousand before it is interpreted (i.e., 100K = 100,000). PCI/CFR will use this magnification figure and the calibration information mentioned above to calculate the width of the image. By selecting the appropriate check boxes, you have the choice of actually drawing the micron marker, of using this information to calibrate the measurement functions or of doing both. PCI/CFR will remember these settings between sessions. Pressing the Font button allows you to select the font used to label the micron bar.
If you elect to draw the micron marker, it will appear at the bottom right of the image when you press the OK button. The micron marker will be placed into the overlay as two separate objects-the bar itself and the text indicating the length of the bar. Each of these objects can be manipulated in the usual ways as separate overlay elements.
|
|
